
My Kaossilator broke. I fixed it.
I’m as surprised as you are. I mean, sort-of-but-not-really because I’m in IT and I’ve always been fascinated with how things work, and I’ve fixed hundreds of computers… but this is different, it’s a piece of music gear. It doesn’t have standards about where and how things are placed inside of the casing, rather it’s entirely proprietary and isn’t designed for end-users to take apart.
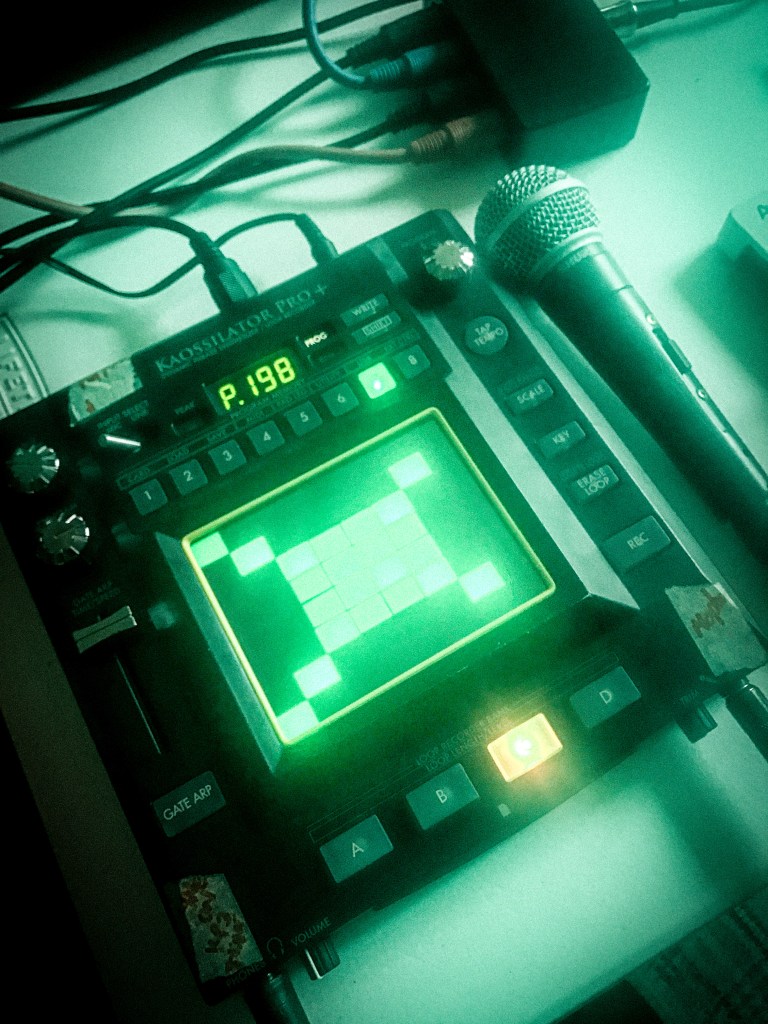
That said, when I discovered that mine was broken this morning, stuck playing from one spot of its XY pad, no matter what setting chosen, it didn’t take long for me to start thinking about trying to replace it by searching on the internet. The typical search stuff came up, with items for sale in various internet markets, along with stuff that surprised me: repair parts for Korg units. The surprise turned back into dismay when I realized that there were no replacement screens available.
Then it hit me that I also own a Korg Kaoss Pad Pro 3+ (KP3+). They look a lot alike, I thought. Why not take it apart and see? What could go wrong? Nervous laugh. So, I started with the KP3+ teardown, figuring that I’d have some similarities between the two devices. I rolled out my art cart and started pulling screws from the back and from the boards inside. I was even feeling sassy because it had occurred to me to remove the knobs and sliders from the device before getting too far into the disassembly.
The first things that I found that made me laugh out loud was that the KP3+ has a solder spot or something on the board that allows the mainboard to be fitted to either of the devices. I was feeling pretty good that the screen would be interchangeable thanks to that.

After the disassembly, and removal of the screen, I was feeling kinda cute, kinda sassy, certain that this would be a slam-dunk…then it occurred to me that I didn’t have another surface super-handy to disassemble on, so I had to clear off a table and get to it. With both devices part and a replacement screen in hand, it was time to see if I could get it all back together.

My first hurdle was to be that the ribbon cable that connects the screen to the mainboard was a mother scratching scratch master. I have no idea how these things are assembled in the factory, but they obviously must have some serious engineering go on…or one hell of a jig or something. Anyhow, that was hurdle one, but there proved to be several, including getting the screen to sit properly in the window, lining up screw holes, along with forgetting to put buttons back in the face, not to mention that I had to put in like (literally) 20 screws before it was back together and safe to turn on and test.

When it powered up, I was pretty ecstatic. When it worked for looping, I was the moon and played music for like half an hour as a celebration. Then, I tried to do something (anything) with the XY screen and only could get the left hand side of the screen to register in the Y axis. After being mildly disappointed that I might have to open it back up, it occurred to me that I might need to recalibrate the screen. I found the instructions on how to enter calibration mode by holding down the TAP button then three on the numeric keypad (other numbers doing other functions) . I tapped in the middle of the first square, in the lower left, felt confident, then tapped the second square, which appeared in the upper left… then felt like crap when I realized that it would not register a tap on the right hand side of the screen at all.
So, that mean going back in…and what? I had no idea, but went back in anyway, figuring that it was likely a cable that I didn’t seat properly. I thought to start at the cable that connected the screen to the mainboard, which meant taking our two boards from the back. I did so, and put it all back together again, with the same result.
This was starting to be disheartening, so I thought I’d try the other cable that connects the mainboard to the two floating boards. So, I took it apart yet again and then got really brave (or sloppy and dangerous) and powered it on while it was in two pieces to test. I was rewarded for my endeavors, because the XY pad worked fine!
So, I reassembled again and, with a smile, plugged it all back in and powered it on…powered it on…oh no…couldn’t power it on. I had a moment of adrenaline and tunnel vision that sometimes follows bad decisions. The “there’s no undo button for this maneuver” feeling.
All I could do was retry the same maneuver, opening it back up and seeing what there was to see. That time, I found the other end of the same cable had loosened on re-entry. The next time, it was that there was a buzz from a bad ground. The last time was because a board was not secured by its particular screw and had to be re-tightened…
I was at last rewarded with a completely working device (and a KP3+ with the problem the Kaossilator had when I had started), with no hum and a working XY pad.
This called for celebration, so I played music for another half an hour!
Thanks that actually helped!!!
Hey that’s awesome to see and hear ? I have a question for you !? I have a kp3+ and everything is perfect but the power button onlys let’s me turn it on , not off so I want be able to fix it so I can power down safely. If u know anything or think u could help please reply ? thanks